

Ultimate Guide to Offboarding Users in MS365

When someone leaves your company, taking care of their digital footprint is a priority. You need to make sure their email is handled properly, their access is cut off, and their data is secure. Offboarding in Microsoft 365 involves several important steps, from resetting passwords to deciding who gets access to the departing employee’s mailbox. Let us walk through the process together.
Step 1: Disable the User Account
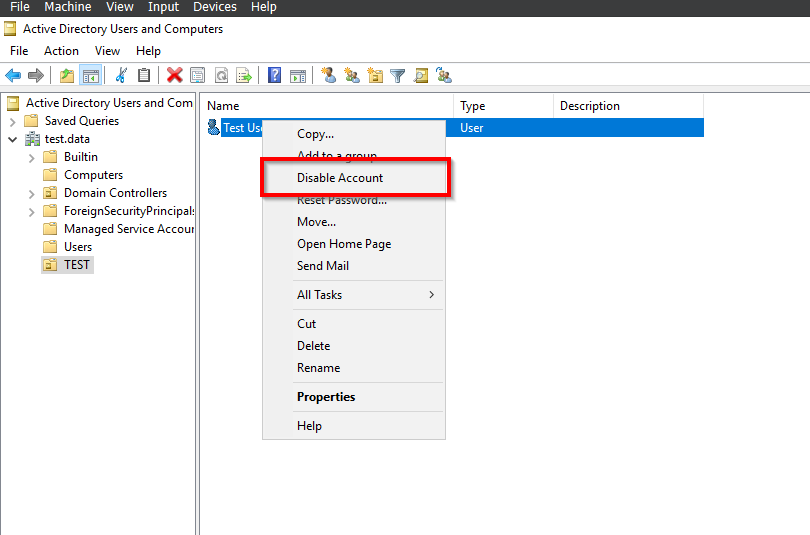
The first thing you want to do is disable the user in your on-premises Active Directory (AD). You need to make sure this change syncs properly so the account in Microsoft Entra ID gets locked out too. A common mistake I see is people moving the disabled user to a different Organizational Unit (OU) but failing to sync that OU to the cloud. You definitely want that disabled user synced so their cloud access is completely blocked.
Step 2: Reset the Password
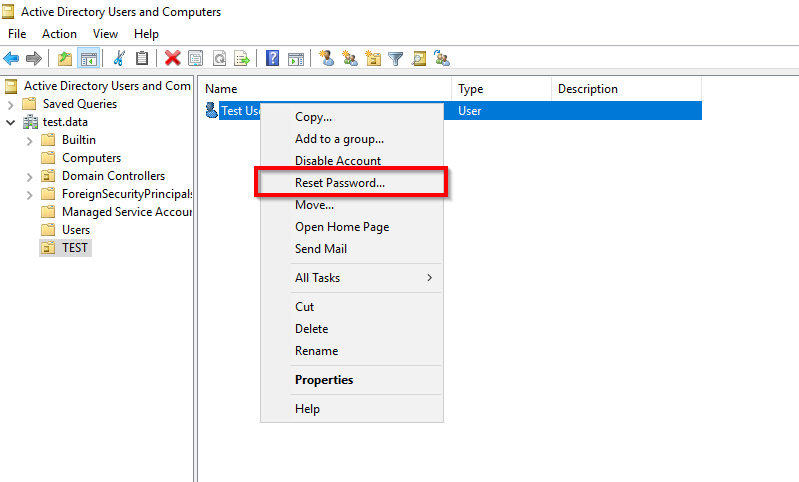
Go ahead and reset their password right in your on-premises AD. Once you do that, Microsoft Entra Connect will pick up the change and sync the new password up to the cloud.
Step 3: Handle Email Aliases
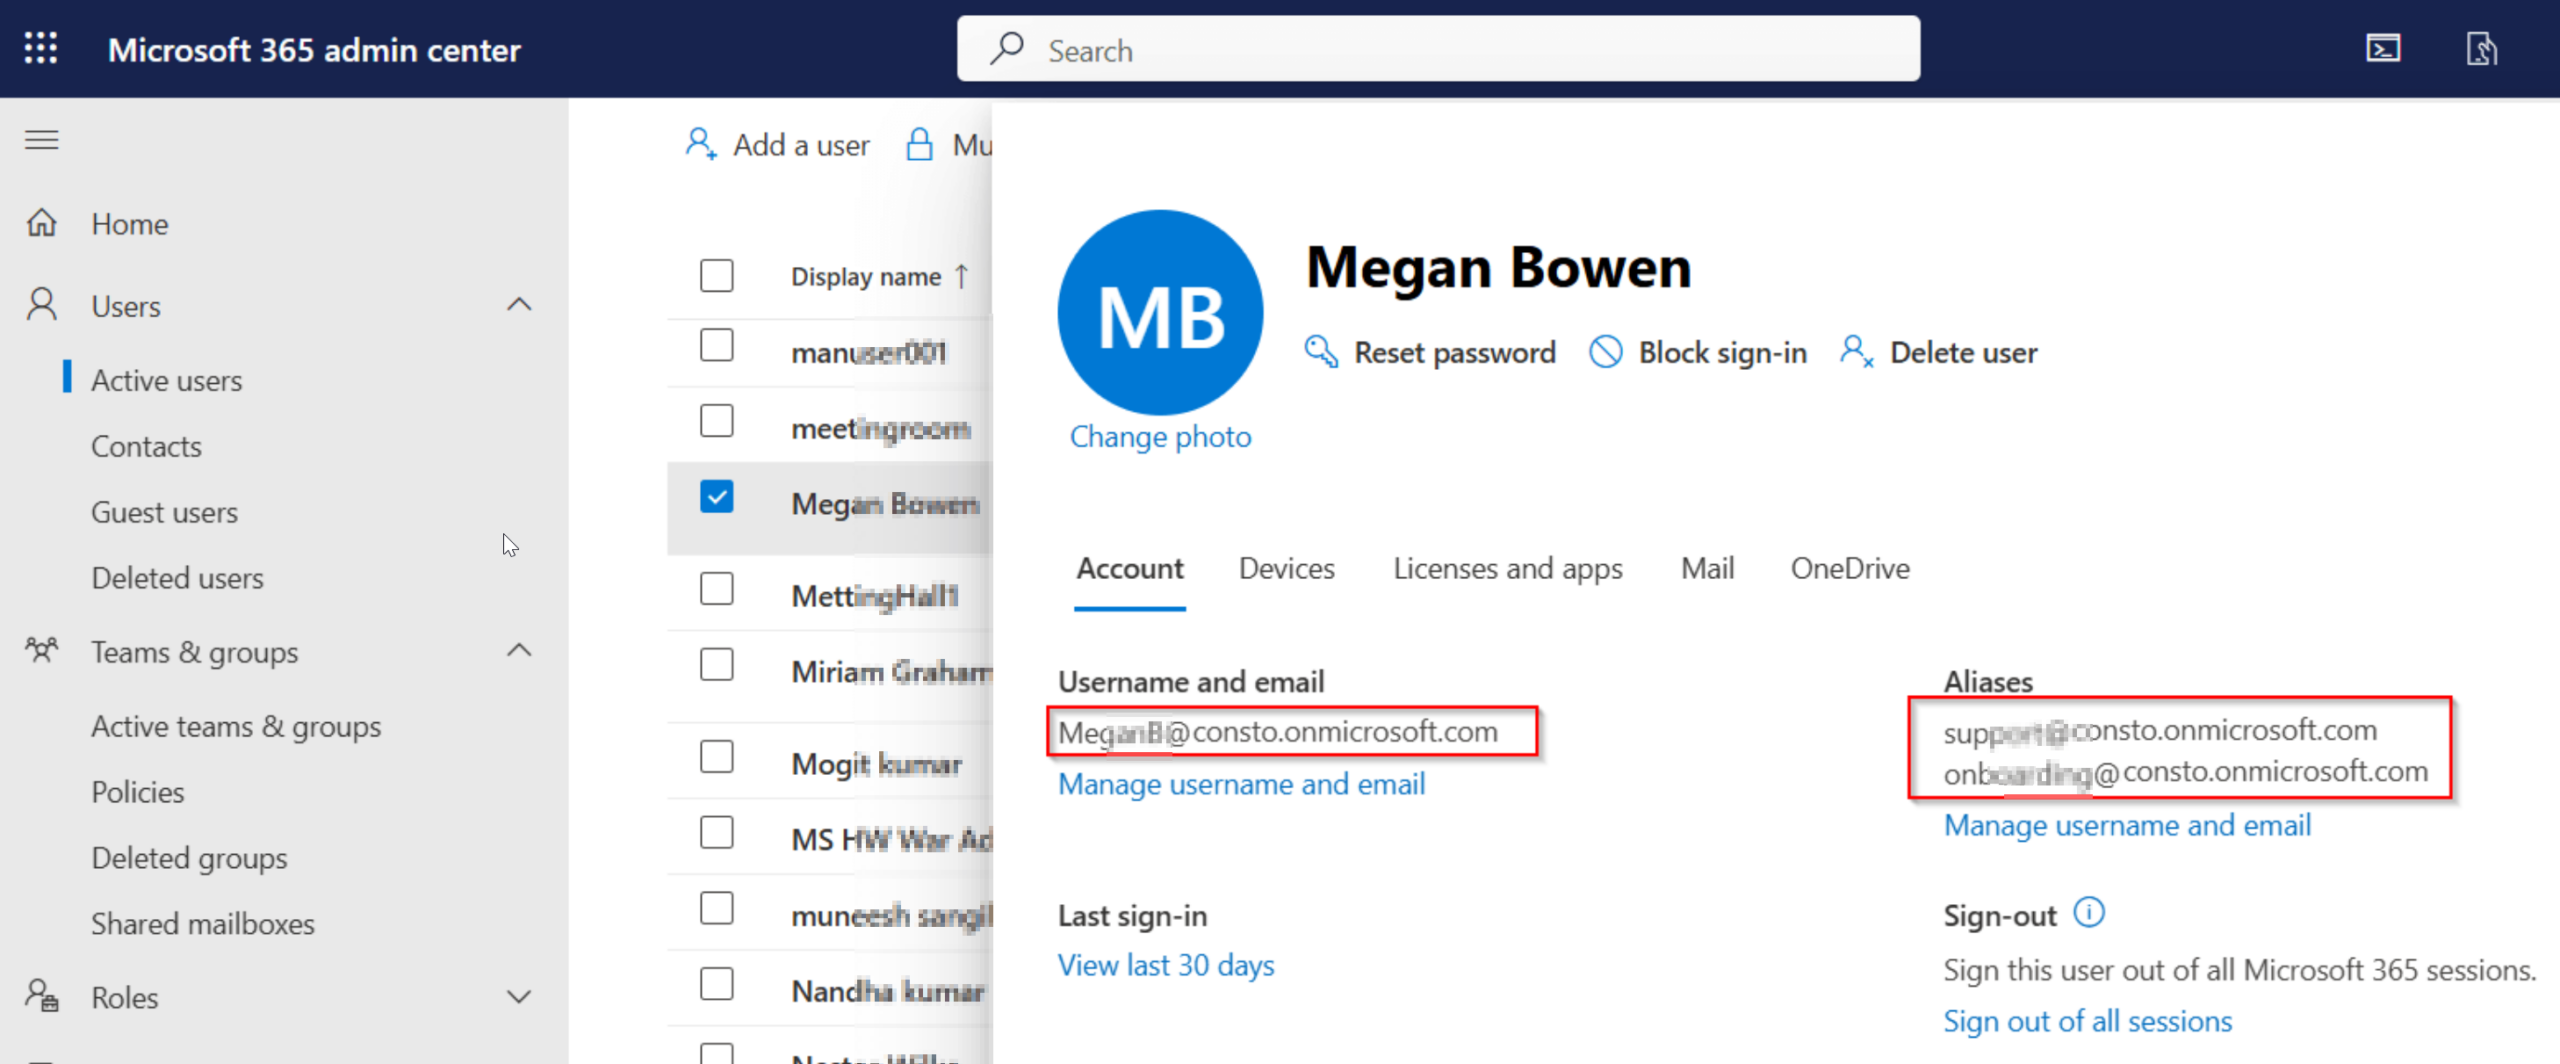
If the departing user had specific email aliases that someone else needs, you should transfer those addresses to another mailbox. If no one needs them, you can either leave them as they are or just remove them to keep things clean.
Step 4: Clean Up Group Memberships
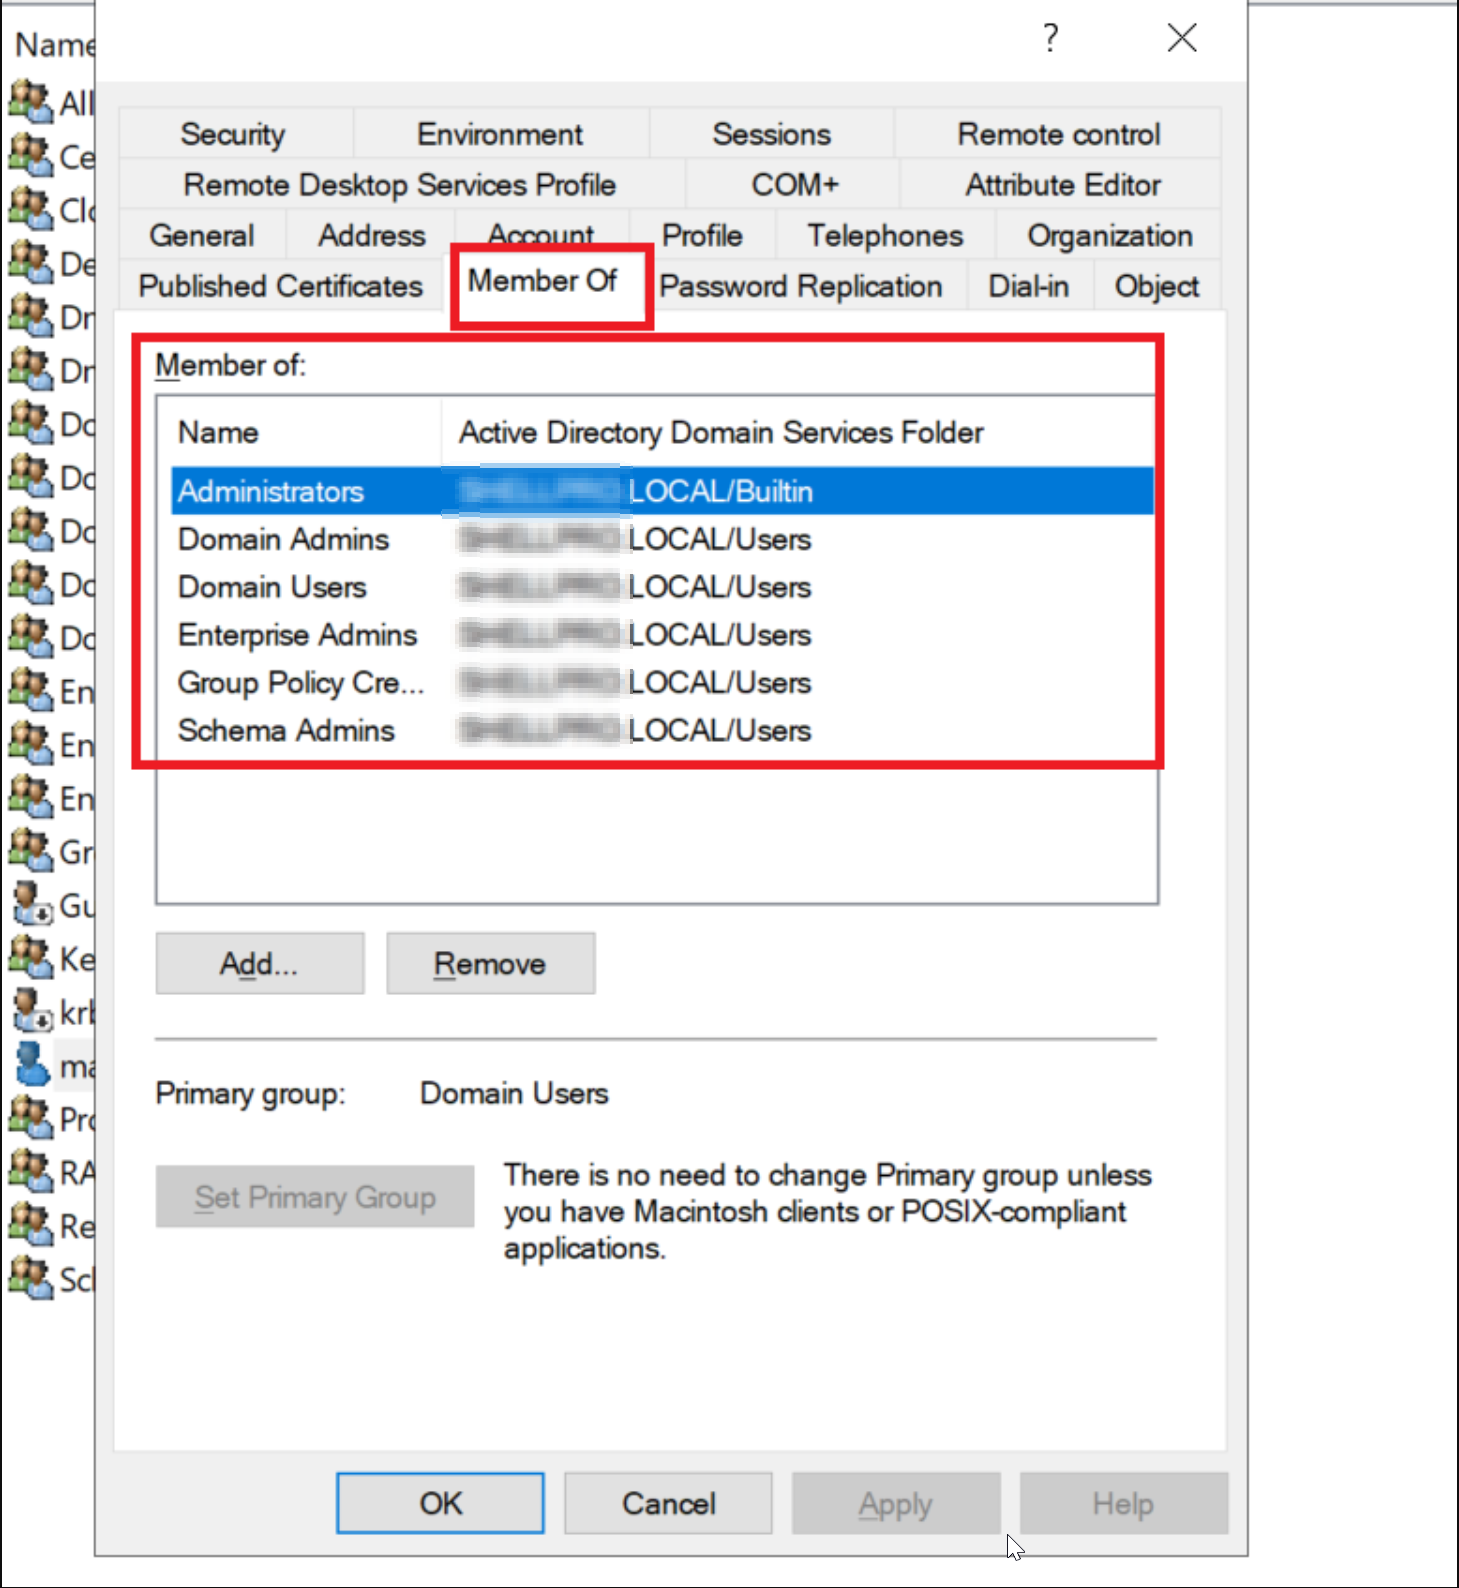
Open up the user properties in your on-premises AD and remove the user from all on-premises groups. If your organization uses Microsoft 365 groups, do not forget to log into the cloud environment and remove the user from those groups as well.
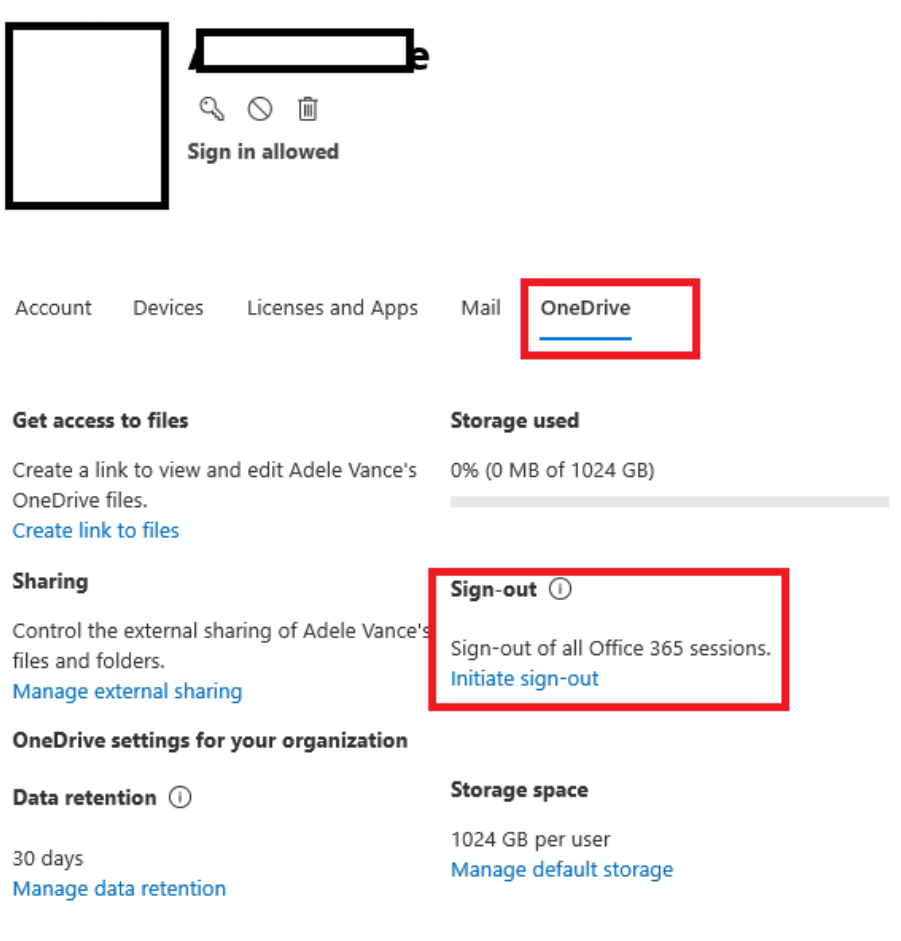
Step 5: Force a Log Out
You want to be absolutely sure the user is logged out of all active sessions. You need to enforce this across both your on-premises AD and Microsoft 365 environments.
Step 6: Convert the Mailbox
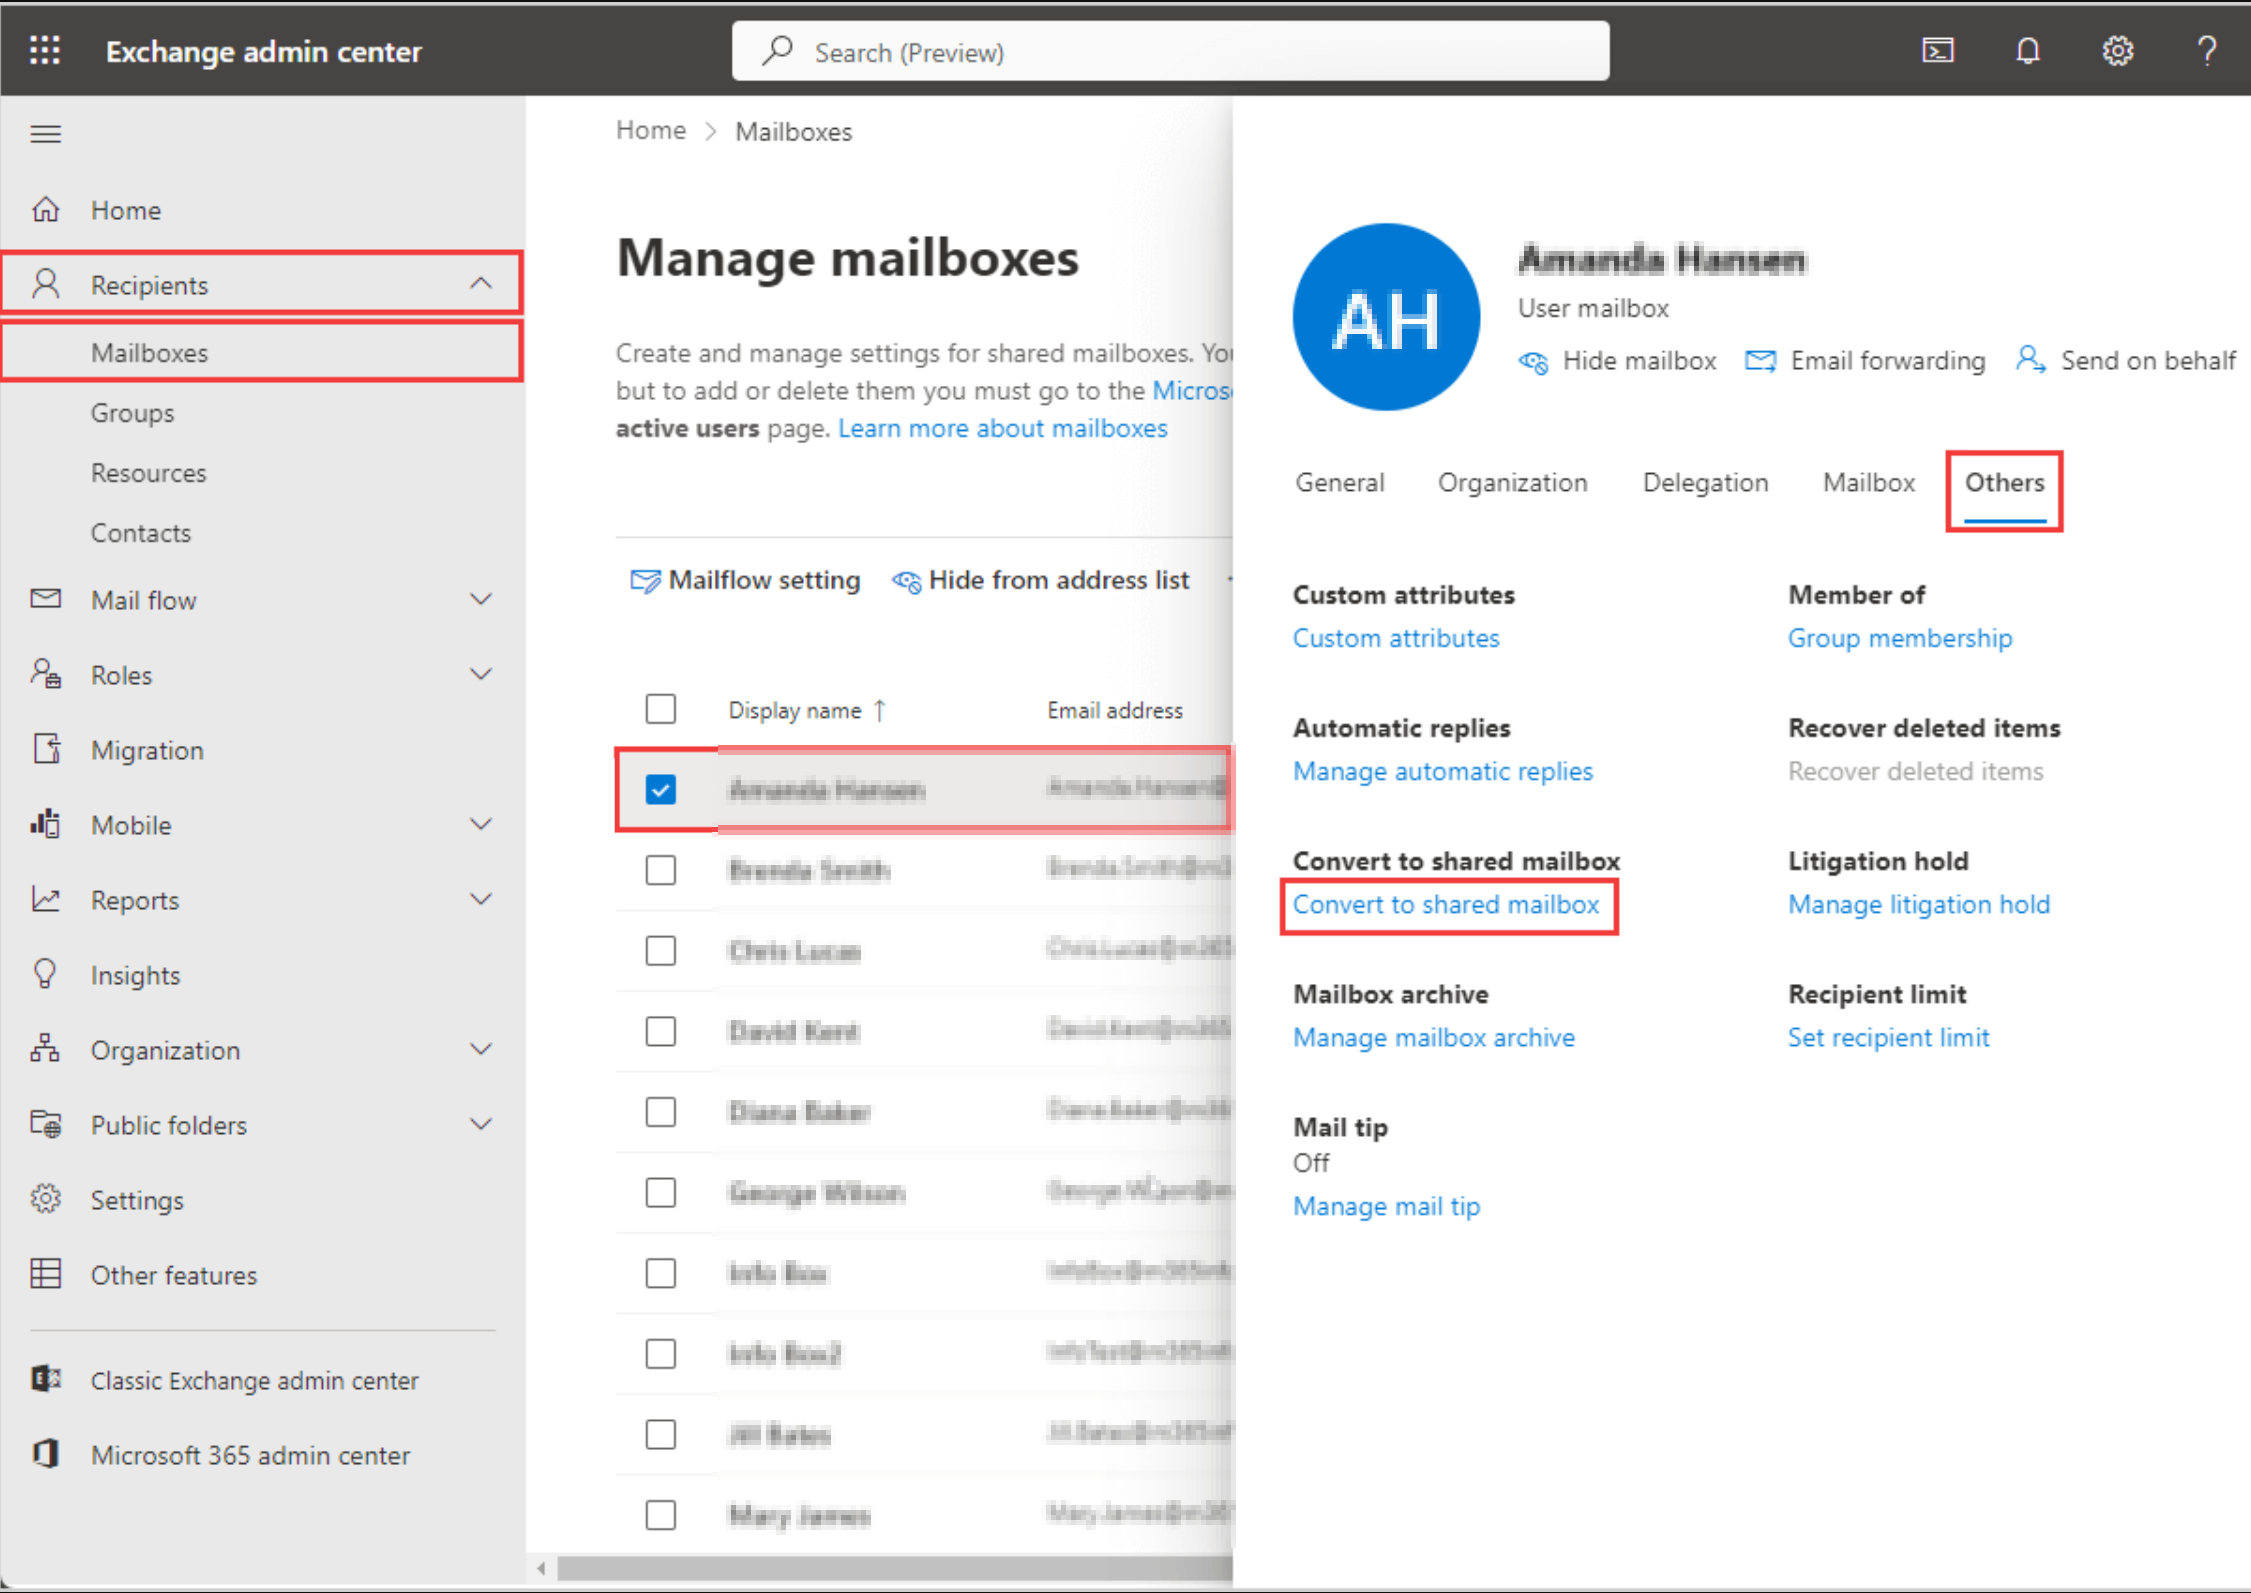
If you are running an Exchange Hybrid setup, you have to do the conversion through the Exchange Management Shell on-premises. After the next Microsoft Entra Connect Sync cycle finishes, you will see the mailbox show up as a shared mailbox in the cloud. At that point, you can usually drop the license. Check out my guide on converting mailboxes in a hybrid setup for more details.
Just keep in mind that if the mailbox is larger than 50 GB, you can still convert it, but you might not be able to pull the license right away. For mailboxes over 50 GB, I always suggest grabbing an Exchange Online Plan 2 license to keep the mailbox active. It costs a little money, but it is a small price to pay to ensure you do not lose any data.
Step 7: Clear Out Delegations
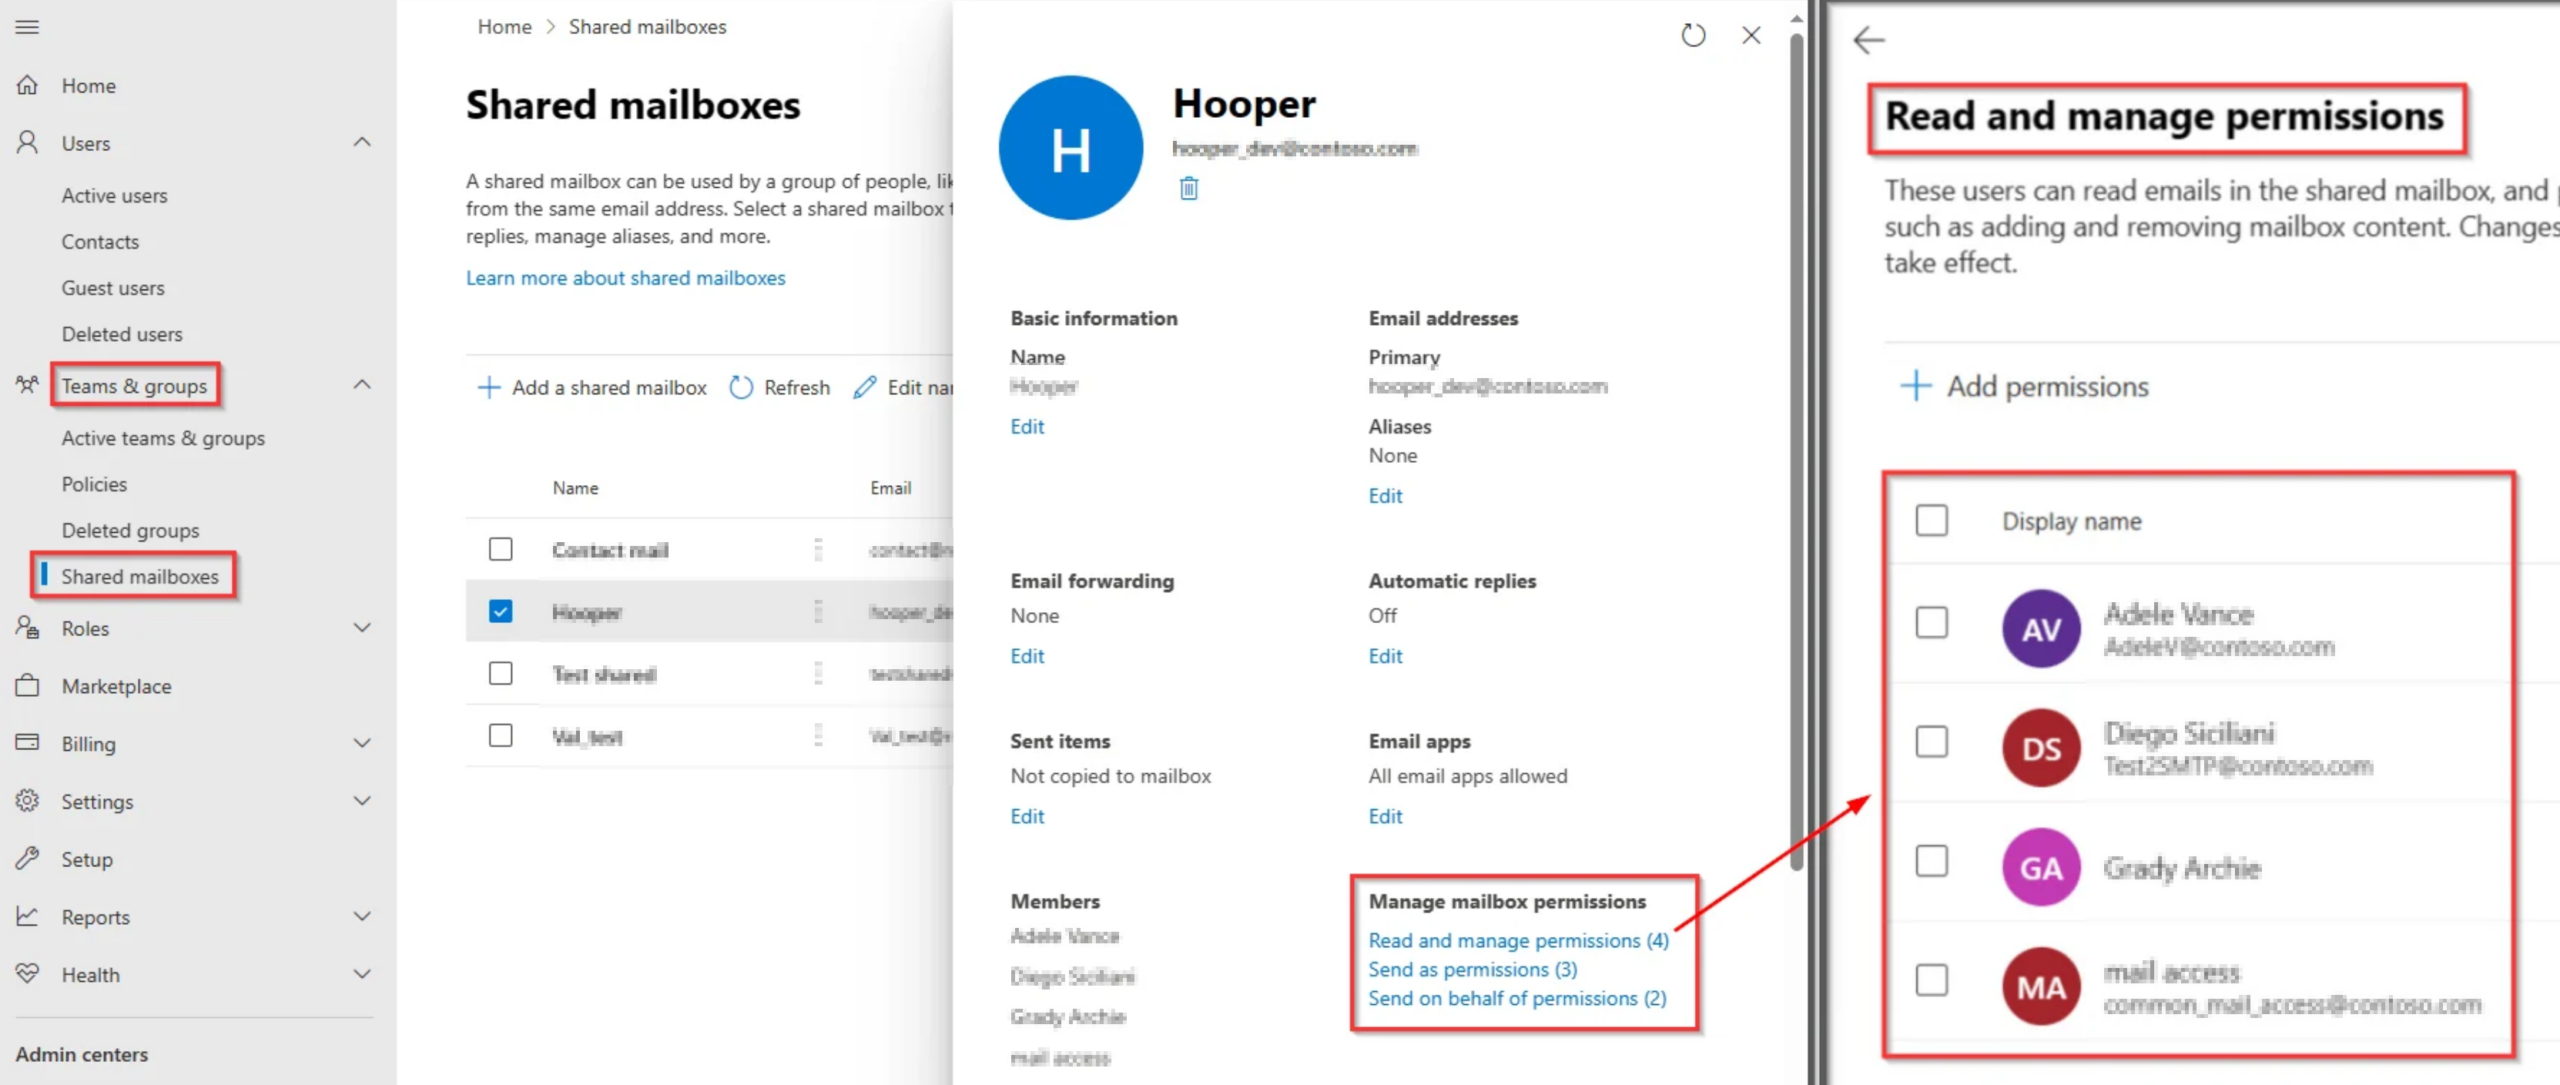
Unless someone specifically needs access to the old account, you should strip away all mailbox delegations. You really do not want other users poking around or deleting old emails unless there is a clear business need for them to be in there.
Step 8: Hide from the Global Address List
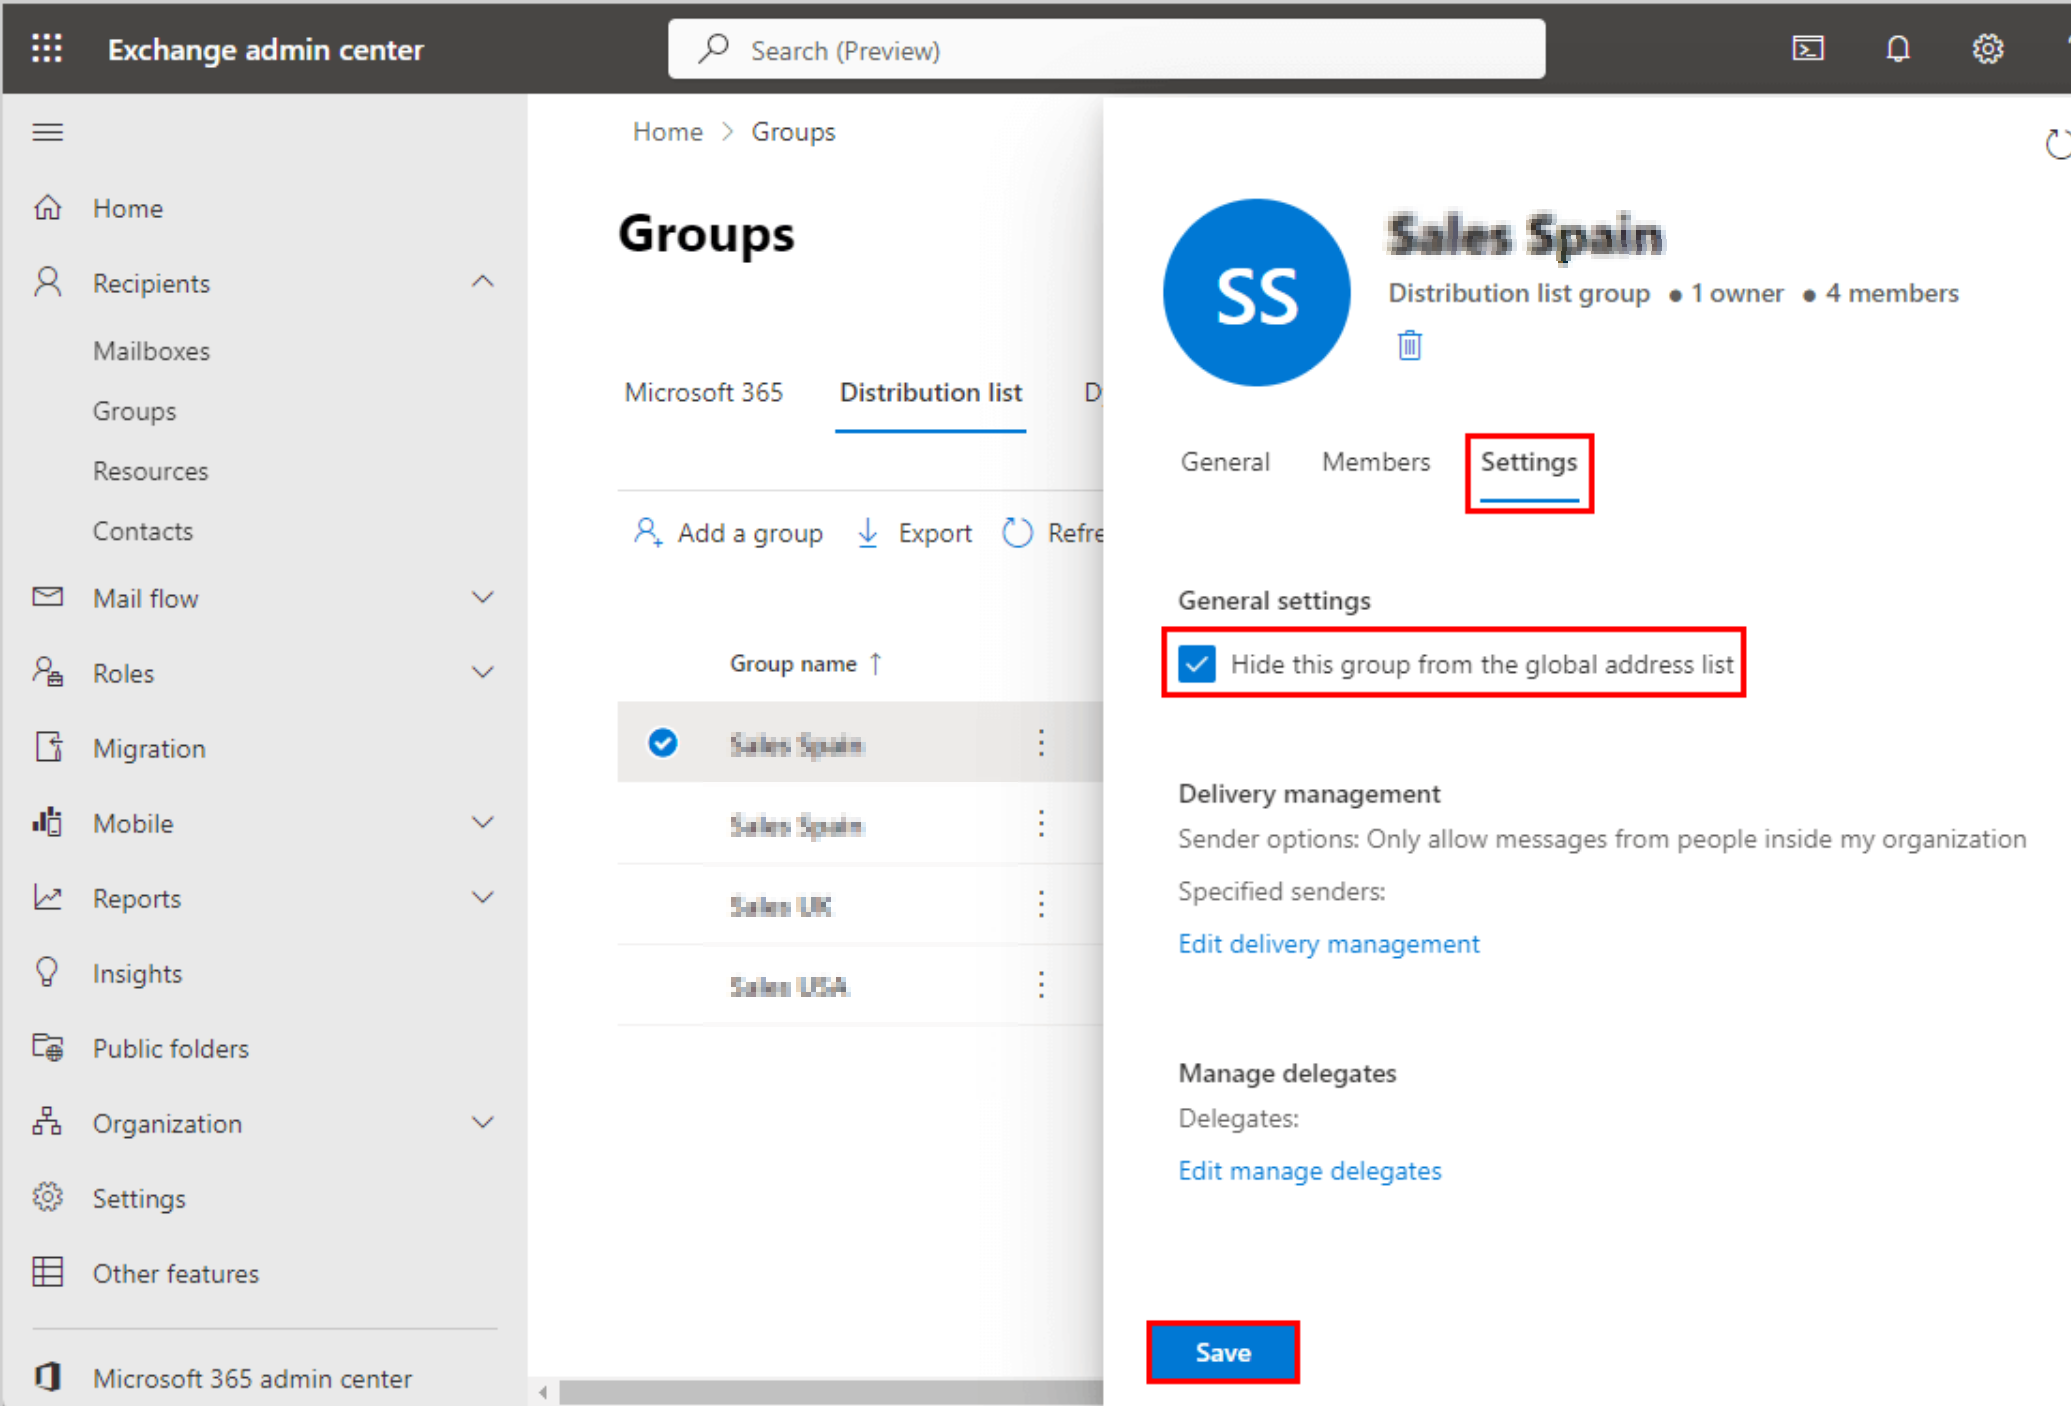
When someone leaves the company, there is no reason for them to still show up when people search the company directory. Make sure you check the box to hide their mailbox from the Global Address List (GAL).
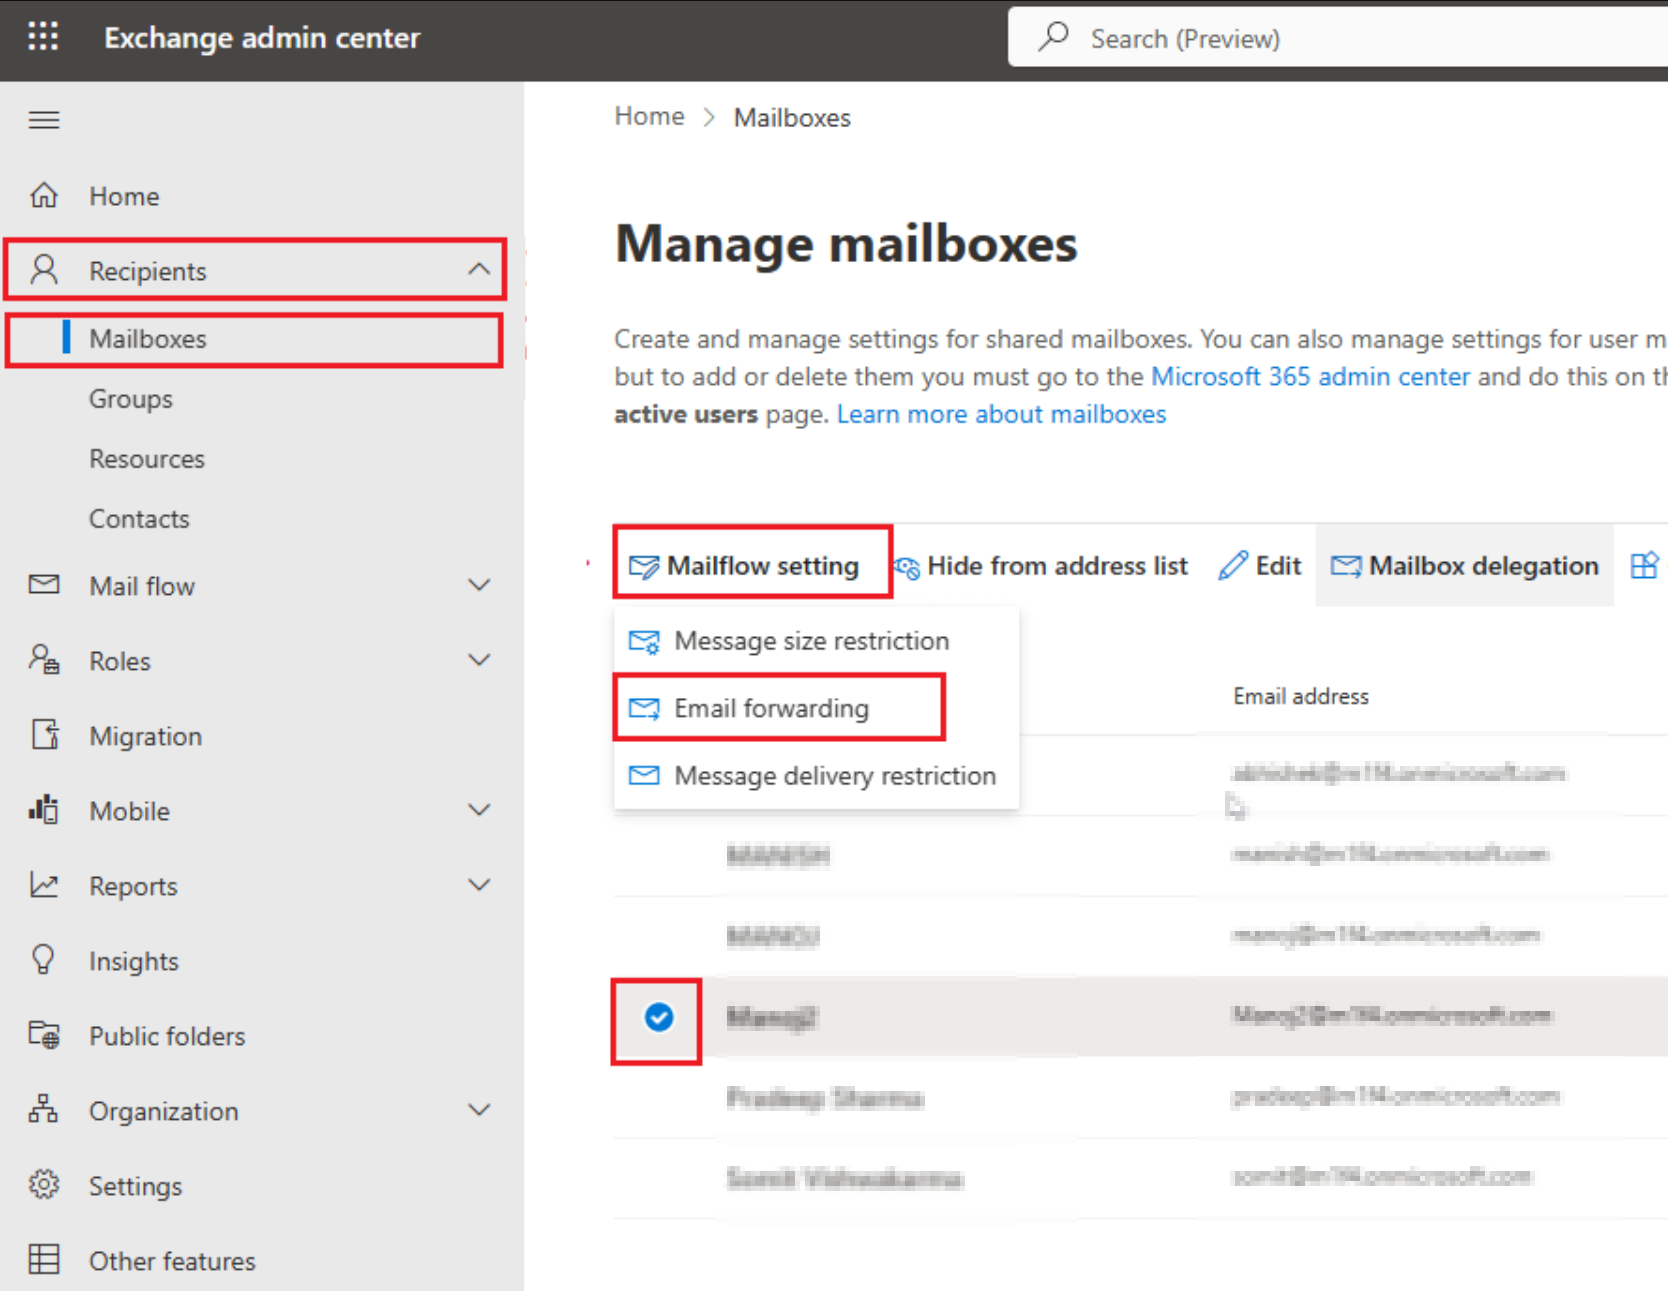
Step 9: Manage Email Forwarding
Sometimes a departing user or a manager will ask to have emails forwarded to a new address. Microsoft 365 disables external forwarding by default because it is a major security risk.
If you absolutely must forward mail outside the organization, make sure you enable external forwarding only for a specific group of users. Never turn it on globally. I recommend setting up the actual forwarding rules right in the Microsoft 365 admin center so your other admins can easily see what is going on. And always remember to send a test email to confirm the forwarding actually works.
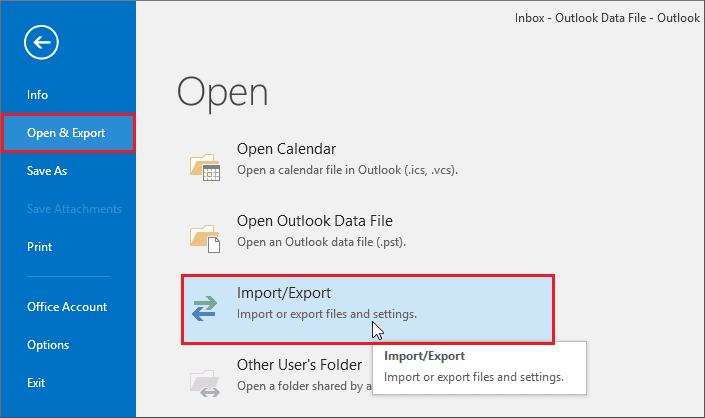
Step 10: Export a PST Backup
If you plan to stop forwarding emails after a few months and want to finally remove the license, it is a great idea to export the Microsoft 365 mailbox to a PST file. This gives you a permanent offline backup just in case you need to reference old emails down the road.
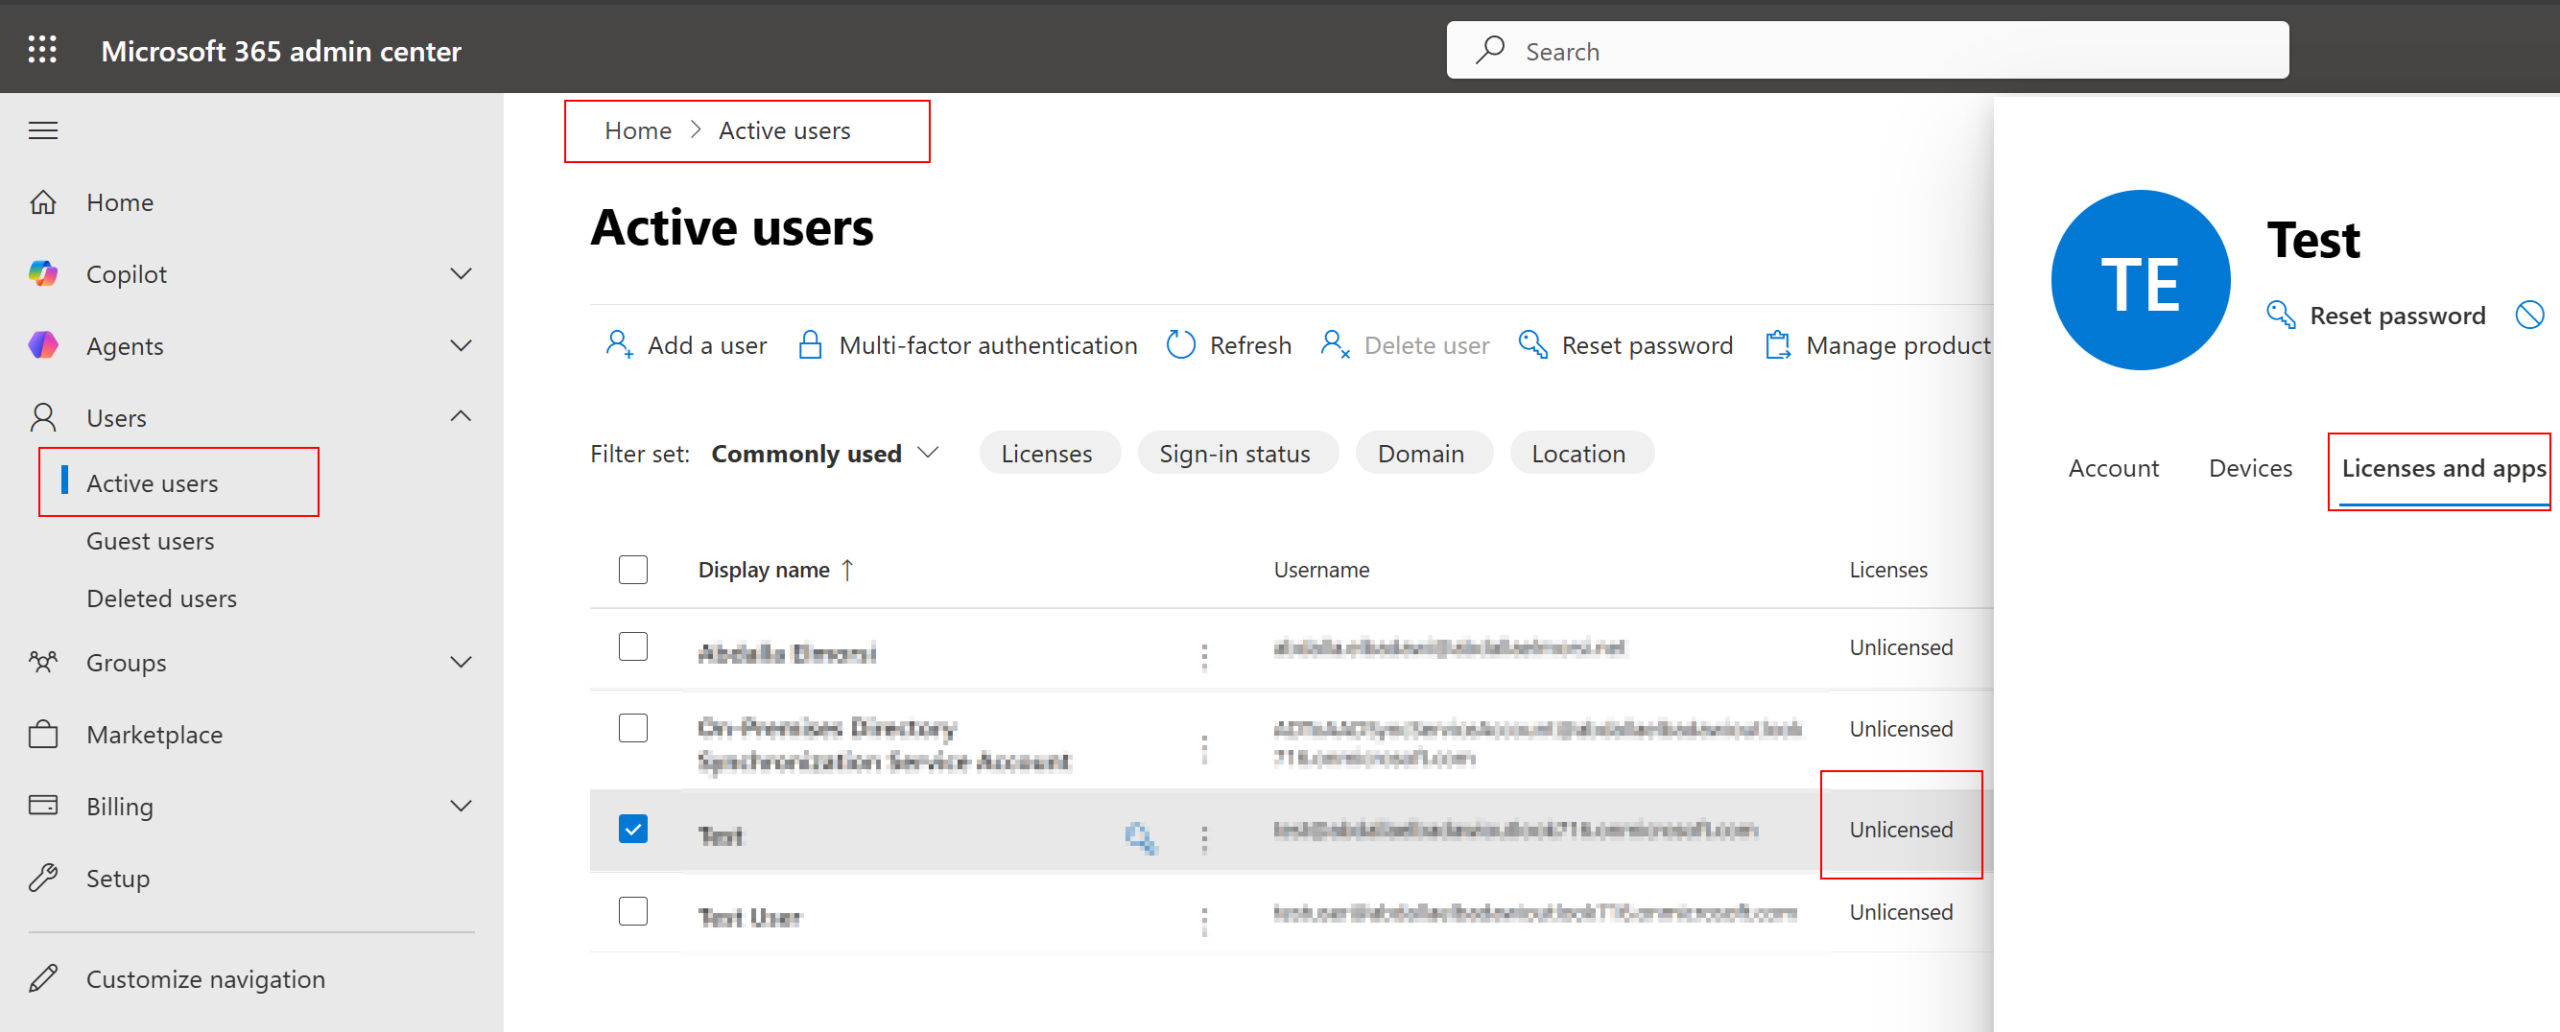
Step 11: Reclaim the License
If the account is converted to a shared mailbox under 50 GB or if you are ready to delete the user entirely, go ahead and remove their Microsoft 365 license. If you skip this step, you will just be throwing money away every month.
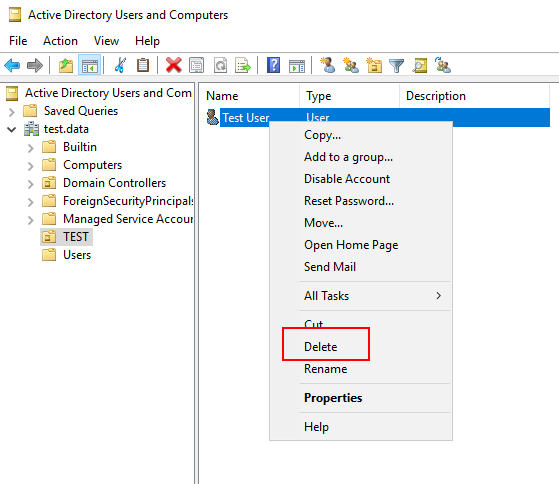
Step 12: Delete the Account
The final step is to delete the account itself. You should do this directly from your on-premises Active Directory. The deletion will sync up to the cloud via Microsoft Entra Connect and remove the cloud account as well.
If you ever make a mistake and need to bring the account back, you can follow the steps in my article about restoring deleted hybrid users.
Wrapping Up
Offboarding an user in Microsoft 365 involves quite a few steps, and every company handles things a little differently. You should build a solid checklist for your organization and make sure you keep it updated as technology changes. Once you have a perfect checklist dialed in, your next goal should be to automate the whole process using PowerShell.