
Entra ID Connect Health and Troubleshooting Synchronization Error

Synchronization is the backbone of any hybrid identity environment. When your on-premises Active Directory (AD) data isn’t flowing correctly to Microsoft Entra ID (formerly Azure AD), your users quickly lose access, and the security of your entire organization is at risk.
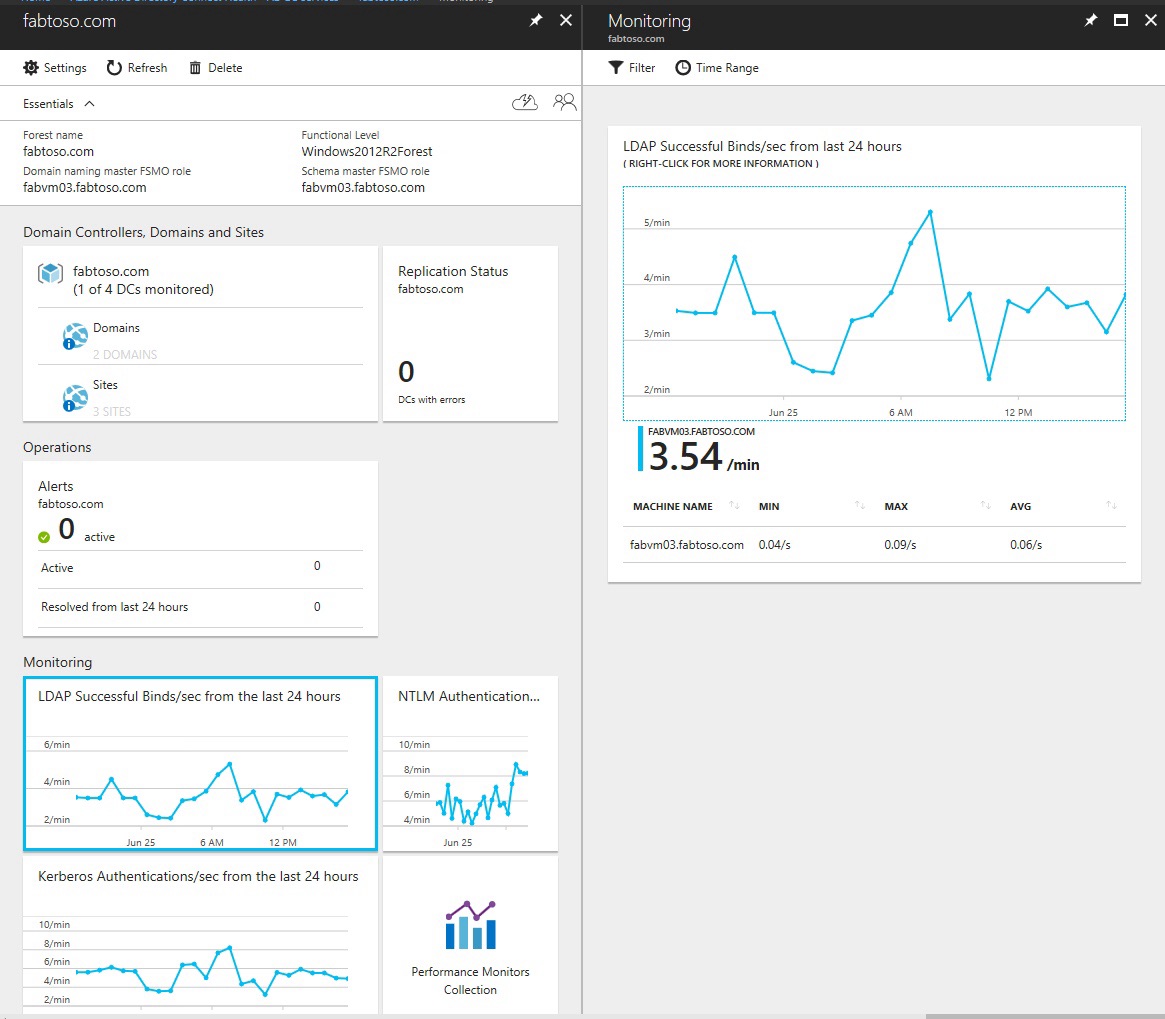
Microsoft Entra ID Connect Health is the essential, often underutilized, monitoring agent that provides the visibility needed to keep your sync engine running smoothly. This guide provides a step-by-step, real-world approach to using Connect Health and the Synchronization Service Manager to diagnose and fix the most common sync errors.
1. Initial Diagnosis: Using the Entra ID Connect Health Dashboard
Before logging into your sync server, the Connect Health dashboard is your first line of defense. It aggregates critical information from your Entra ID Connect installation.
Step 1: Check the Sync Status Overview
1. Navigate to the Microsoft Entra admin center.
2. Go to Health & Monitoring > Microsoft Entra Connect.
3. Click on the Sync services tile.
————-
• What to Look For:
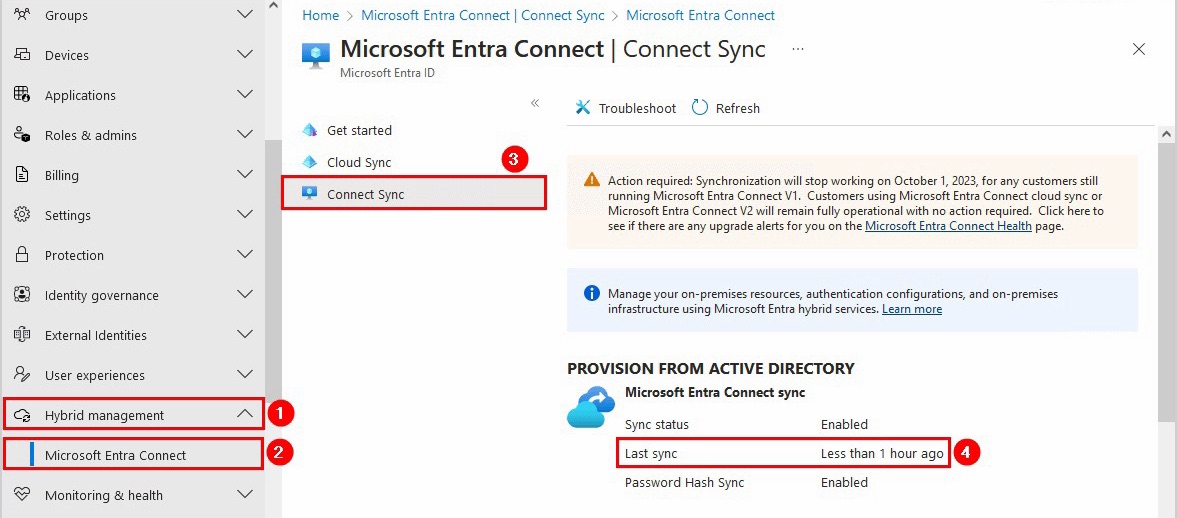
• Last Synchronization: Ensure this is recent (within the last 30 minutes). A stale sync time indicates the service has stopped running entirely.
• Synchronization Status: Look for Success. Warnings or errors require immediate investigation.
• Synchronization Errors: This tile provides the number of objects currently in an error state.
Step 2: Analyze Synchronization Error Details
Clicking the Synchronization Errors tile brings you to the crucial list of failing objects.
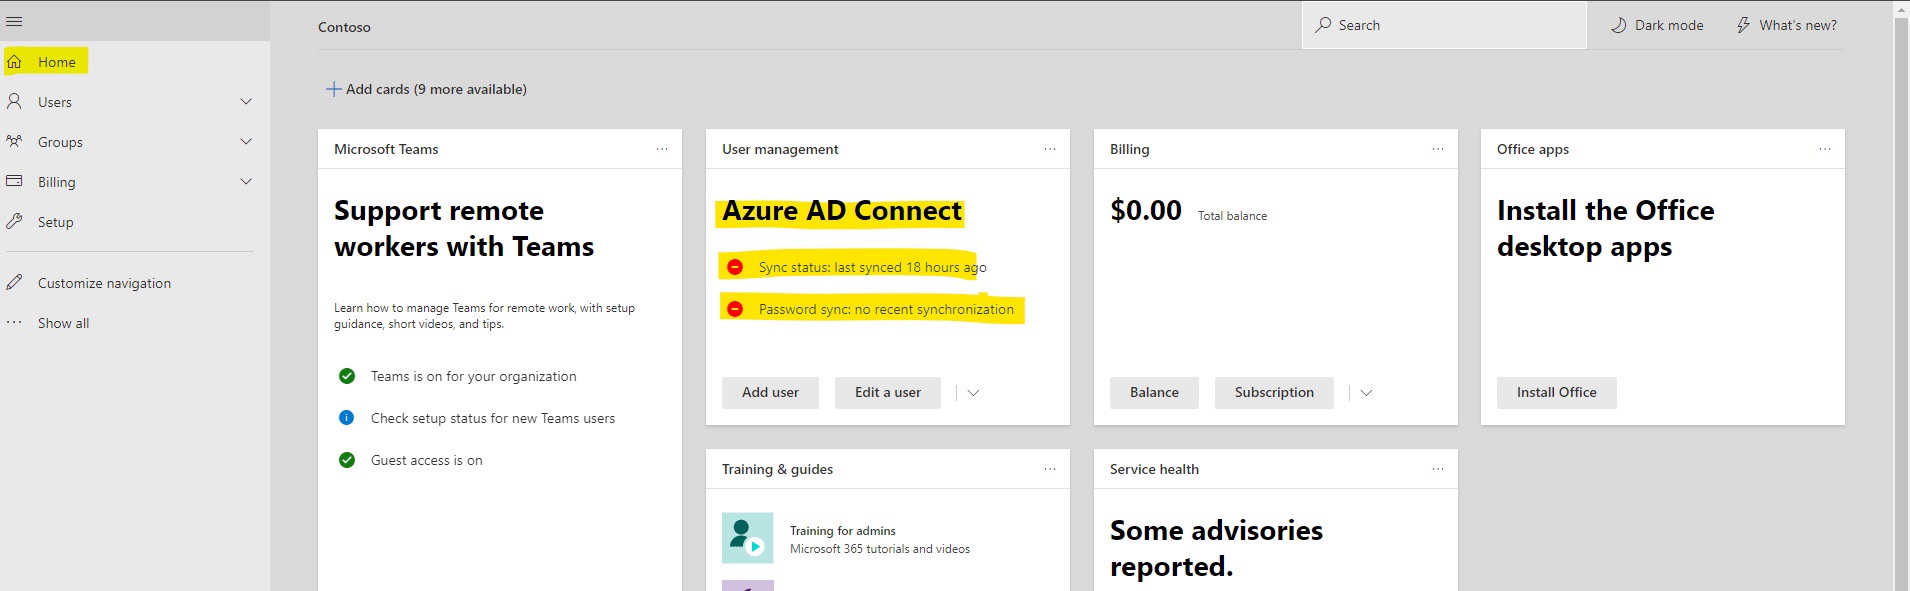
• Identify the Error Type: Errors are typically grouped into categories:
• Data Validation Errors (e.g., AttributeValueMustBeUnique): The most common error, indicating a conflict (like two users with the same User Principal Name).
• Synchronization Rule Errors: Issues related to the declarative provisioning logic (less common unless custom rules are deployed).
• Connector Space Errors: Issues preventing data from flowing into or out of a connector space (often related to permissions or schema mismatch).
• Focus on the Details: Select a specific error object. The details pane will show:
• Attribute Conflict: The specific attribute causing the conflict (e.g., userPrincipalName).
• Conflicting Object: The DN (Distinguished Name) of the object in AD that is failing.
2. Deep Dive: Troubleshooting with the Synchronization Service Manager
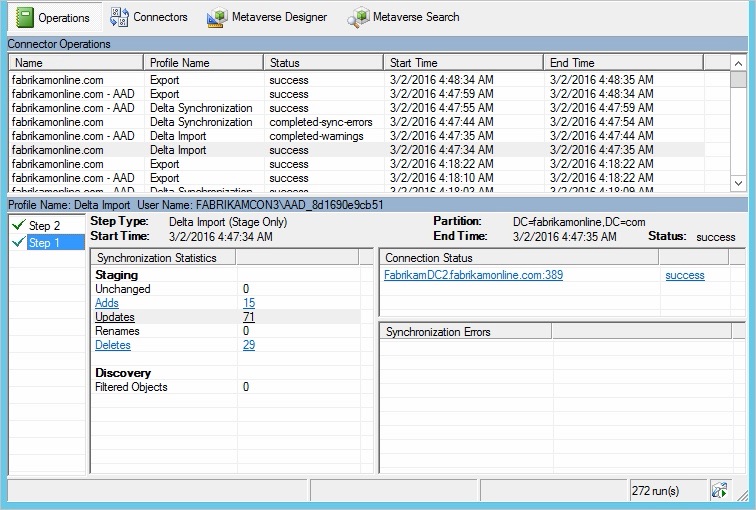
Once you’ve identified an object or an operational failure using Connect Health, you must go directly to the sync server for the granular fix.
Step 3: Check Connector Operations History
On your Entra ID Connect server:
1. Open the Synchronization Service application (search for it in the Start menu).
2. Go to the Operations tab. This is a chronological record of every run cycle.
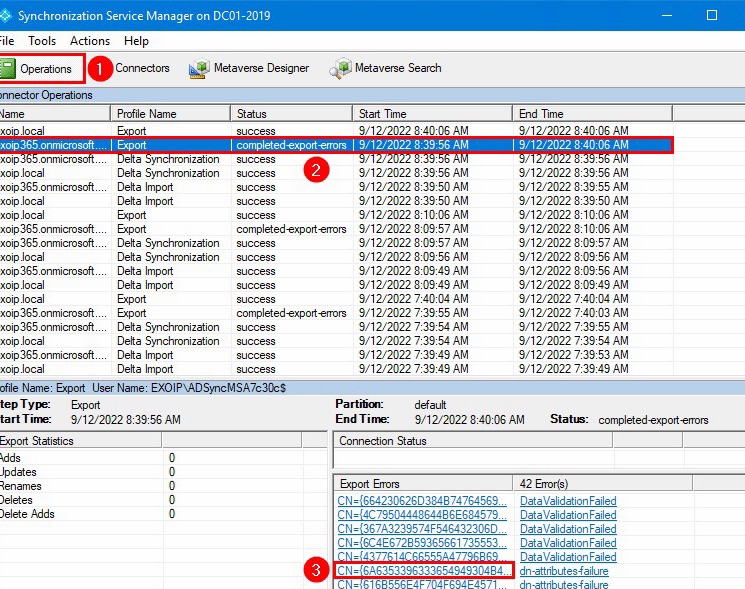
3. Filter and Analyze: Look for recent operations with a status of Completed-errors, Stopped-server-down, or Stopped-extension-dll-exception.
————-
• Completed-errors: This is normal for a healthy environment, but you must check the export status. Focus on the Export operation for Microsoft Entra ID (or Azure AD) Connector.
• Stopped-extension-dll-exception: This is severe and often indicates a problem with a custom synchronization rule or connector extension.
Step 4: Isolate the Conflicting Object
If Connect Health pointed you to a AttributeValueMustBeUnique error, you can use the Synchronization Service Manager to find both the failing object and the existing conflicting object.
1. In the Operations tab, find the latest successful Import run for your on-premises AD connector.
2. Go to the Connectors tab, right-click the Microsoft Entra ID connector, and select Search Connector Space.
3. In the Scope tab, select Pending Export and look up the attribute value that is failing (e.g., the duplicate userPrincipalName).
4. Double-click the object to open its Properties.
5. Go to the Export Error tab to see the exact error message as received from Entra ID.
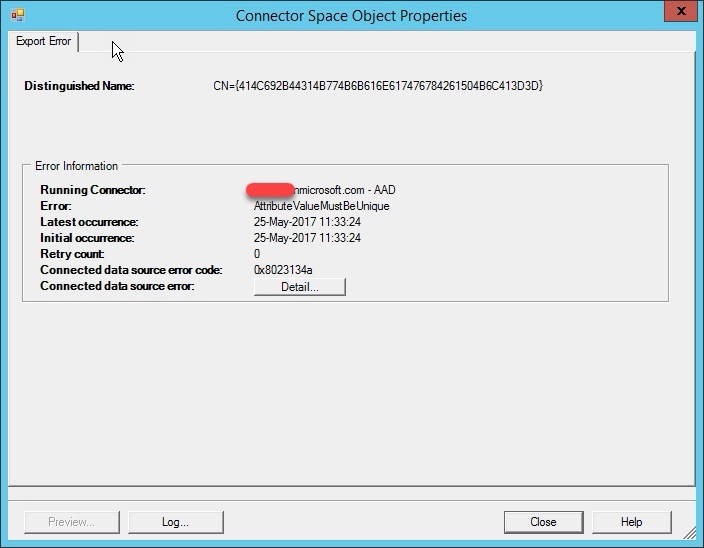
Step 5: Fixing the AttributeValueMustBeUnique Error
This is the most common error. The fix is always to change the conflicting attribute value on one of the source objects in on-premises Active Directory.
1. Identify the two conflicting users (User A and User B) using the details from Connect Health and the Connector Space.
2. In Active Directory Users and Computers (ADUC), locate User A (the one that is currently syncing but blocking the new object).
3. Change the attribute (e.g., the userPrincipalName or proxyAddresses) to a unique value.
4. Locate User B (the new user that is failing to sync) and ensure their attribute value is the desired unique one.
5. Force a Sync Cycle using PowerShell on the sync server:
Start-ADSyncSyncCycle -PolicyType Delta
The next sync cycle will read the correction from AD and successfully export the change to Entra ID.
3. Advanced Troubleshooting: Using the Metaverse
The Metaverse is the central staging area where data from all connected directories (AD, Entra ID) is combined and processed before being exported.
Step 6: Viewing the Object in the Metaverse
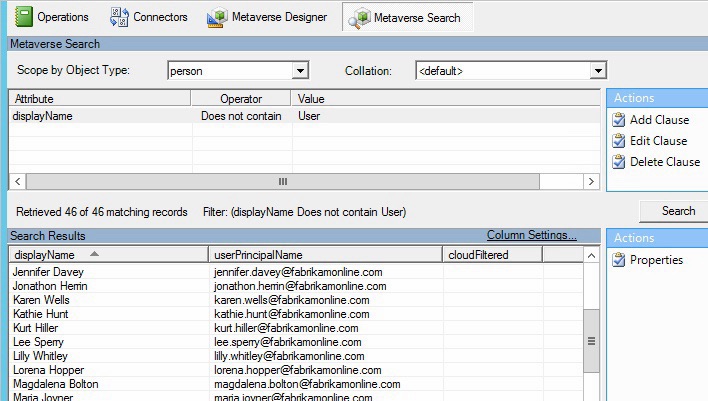
To understand why an object is syncing incorrectly or missing an expected attribute:
1. In the Synchronization Service Manager, go to the Metaverse Search tab.
2. Search for the object by a unique attribute, like employeeID or mail.
3. Double-click the object to view its Metaverse Object Properties.
• Focus on the Attributes Tab: This shows the final, combined state of all attributes.
• Focus on the Connectors Tab: This shows the object’s representation in each connected system (AD and Entra ID). You can click on each connector to see the Connector Space Object Properties and confirm which source system is providing which attribute value.
Step 7: Checking Provisioning Flow (Inbound/Outbound)
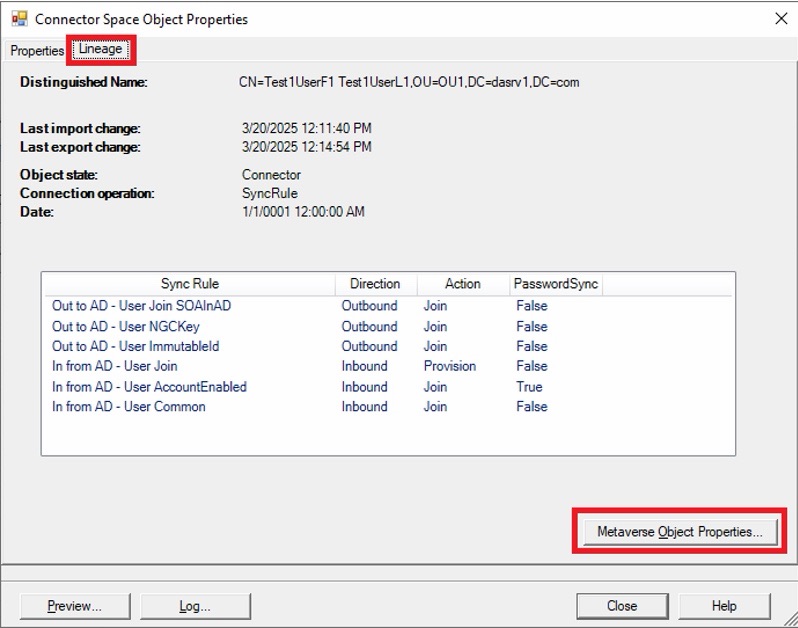
If an attribute is missing in the Metaverse, the inbound sync rule is failing. If it’s in the Metaverse but not in Entra ID, the outbound rule is failing.
1. On the Metaverse Object Properties screen, click Lineage.
2. This shows the Inbound Synchronization (from AD to Metaverse) and Outbound Synchronization (from Metaverse to Entra ID).
3. Review the Synchronization Rules that were applied. If you suspect a custom rule is causing the issue, this is where you can confirm if it was executed correctly.